How to Make an Electric Brew Kettle
Electric brew kettles are specialized appliances designed for brewing beer. They provide precise temperature control and consistent heating. This helps ensure the best flavor and quality in your brew. Electric kettles come in various sizes, making them suitable for both small and large batches. They are easy to use and can simplify the brewing process for beginners and experienced brewers alike.
Making your electric brew kettle has several benefits. First, it allows you to customize the kettle to fit your specific brewing needs. You can choose the materials and features that suit your style. Second, building your kettle can save you money compared to buying a commercial one. Additionally, creating your equipment can be a rewarding and fun project.
Table of Contents
Materials Needed
- Kettle Body: Choose a stainless steel pot, preferably with a capacity of 5 to 10 gallons. Ensure it has a sturdy base and a lid to help retain heat during brewing.
- Heating Element: Select an electric heating element, such as an immersion heater or a heating element kit. Ensure it has adequate wattage (at least 1500-2000 watts) for efficient heating.
- Thermostat: Use an adjustable temperature controller or a digital thermostat to regulate the heating element’s temperature. This helps maintain consistent brewing temperatures for optimal flavor.
- Power Supply: Obtain a heavy-duty electrical cord with a plug that matches the voltage requirements of your heating element. Make sure it can handle the power load safely.
- Thermometer: Invest in a digital or analog thermometer that can measure temperatures accurately within the brewing range. This is essential for monitoring and adjusting the brewing process.
- Wiring Components: Gather electrical wires, connectors, and heat-resistant insulation tape for safe and secure wiring of the heating element to the power supply.
- Safety Equipment: Include a circuit breaker or fuse in your setup to protect against electrical overloads. This is crucial for ensuring safety during the brewing process.
- Other Accessories: Consider adding a valve for easy draining of the kettle after brewing. A well-fitting lid (if not included with the pot) can help retain heat and prevent contamination during the brewing process.
Designing Your Brew Kettle
Choosing the Right Size
Determine the capacity based on your brewing habits. A 5-gallon kettle is suitable for homebrewers, while larger capacities are ideal for batch brewing or parties. Ensure the kettle fits comfortably in your brewing space.
Essential Features to Consider
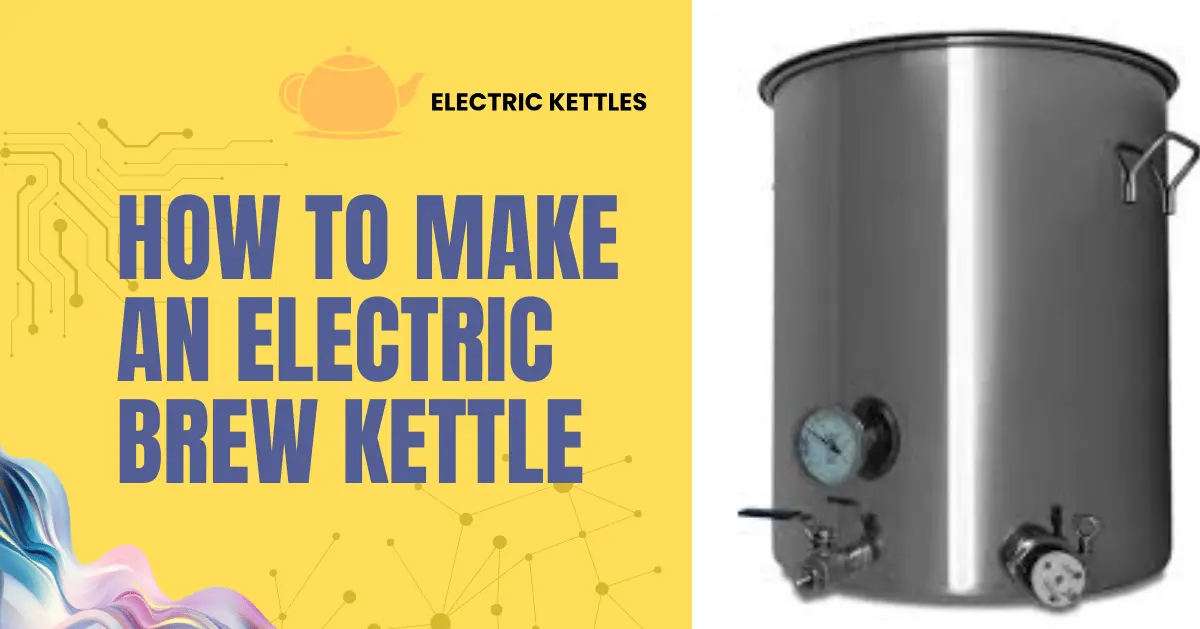
Look for features like a built-in thermometer for easy temperature monitoring, a sight glass for checking the liquid level, and an adjustable spigot for convenient pouring and draining. You might also want to include a recirculation system to enhance temperature stability.
Material Selection
Opt for high-quality stainless steel for durability and heat retention. This material is resistant to rust and easy to clean, which is crucial for maintaining hygiene in brewing.
Heating Element Placement
Plan the placement of the heating element for optimal heat distribution. Ensure it is positioned to avoid hot spots and allows for easy access for maintenance or replacement.
Safety Considerations
Incorporate safety features such as an automatic shut-off mechanism and proper insulation to prevent burns. Ensure all electrical connections are secure and waterproof to reduce the risk of electrical hazards.
Step-by-Step Instructions
Step 1. Preparing the Components
Start by gathering all your materials and tools, including a drill, screwdriver, and wire cutters. Clean the stainless steel pot thoroughly with soap and water, then rinse it well to remove any residues or contaminants. Check all electrical components, ensuring there are no defects or signs of wear.
Step 2. Assembling the Kettle
Carefully measure and mark the location for the heating element on the kettle body. Use a drill with the appropriate bit size to create the hole. Follow the manufacturer’s instructions for installing the heating element, ensuring it fits snugly and securely to prevent leaks. Use a gasket if provided to create a seal.
Connect the adjustable thermostat to the heating element according to the wiring diagram. Ensure that the thermostat is mounted securely and is easily accessible for future adjustments. Test the connections to ensure they are tight and secure.
Step 3. Wiring the Electrical Components
Cut the electrical cord to your desired length based on your setup and brewing space. Strip the ends of the wires carefully to avoid damaging the insulation. Connect the wires from the heating element to the power supply cord, ensuring the connections are secure.
Use wire nuts or terminal blocks for added safety. Apply heat-resistant insulation tape to cover any exposed wires and connections to prevent short circuits. If using a circuit breaker, follow the manufacturer’s instructions for proper wiring.
Step 4. Testing and Safety Precautions
Before using the kettle, double-check all connections and ensure there are no loose wires or potential hazards. Plug the kettle into a power source and turn it on to test the heating element. Monitor the temperature using the thermometer and check for any leaks around the heating element and thermostat. If everything is functioning properly, turn off the kettle and unplug it. Make sure to have a fire extinguisher nearby as a precaution.
Step 5. Final Touches
If desired, install a valve for easy draining at the bottom of the kettle, ensuring it is positioned for convenience. Make sure the kettle is fully assembled and cleaned again to remove any dust or debris from the assembly process. Consider labeling the controls and settings for easy reference during your brewing sessions. Finally, read through the manual of your heating element and thermostat to familiarize yourself with their functions and settings.
Tips for Using Your Brew Kettle
- Best Practices for Brewing: Always start with clean water and fresh ingredients. This ensures the best flavor in your brew. Preheat your kettle with water before adding grains to help maintain a stable temperature. Monitor the temperature closely during the brewing process to avoid overheating or underheating.
- Proper Temperature Control: Use the thermostat to set the desired brewing temperature accurately. If your kettle has a digital display, take advantage of it for precise readings. Make adjustments as needed throughout the brewing process to maintain consistent temperatures, especially during critical stages like mashing and boiling.
- Avoiding Overflows: To prevent overflow during boiling, leave some space at the top of the kettle. Keep an eye on the kettle as it heats, and consider using a fermentation or boil kettle with a larger capacity if you consistently experience overflow issues.
- Cleaning and Maintenance: After each brew, clean your kettle thoroughly to prevent residue buildup and ensure the best taste for future batches. Use warm, soapy water and a non-abrasive sponge. For deeper cleaning, consider using a solution of vinegar and water to remove any mineral deposits. Regular maintenance will prolong the life of your kettle.
- Experimenting with Recipes: Don’t be afraid to experiment with different brewing recipes and techniques. Adjust ingredients, hop varieties, and temperatures to find what works best for you. Keep notes on your brewing process and results to refine your methods over time.
FAQs
Q. What is the best size for a homebrew kettle?
The best size depends on your brewing needs. A 5-gallon kettle is good for beginners, while 10 gallons is better for larger batches. Consider how much beer you want to brew at a time.
Q. Can I use any type of pot for my brew kettle?
It’s best to use a stainless steel pot. Stainless steel is durable and easy to clean. Avoid using pots made of plastic or aluminum, as they can affect the taste of the beer.
Q. How much does it cost to build an electric brew kettle?
The cost can vary based on materials and features. A basic setup might cost around $100 to $300. Adding advanced features or high-quality parts can increase the price.
Q. Is it safe to use an electric brew kettle indoors?
Yes, but ensure proper ventilation. Electric kettles produce steam and heat, so use them in a well-ventilated area to prevent moisture buildup and ensure safety.
Q. How do I troubleshoot my electric brew kettle if it doesn’t heat up?
First, check the power supply and ensure the kettle is plugged in. Next, inspect the thermostat and heating element for any visible damage. If the issue persists, consult the manufacturer’s manual for further troubleshooting steps.
Conclusion
Making your own electric brew kettle is a rewarding project. It allows you to customize the kettle to fit your brewing needs. With the right materials and careful assembly, you can create a reliable tool for brewing great beer. This kettle will help you control temperature and improve the quality of your brews.
By following the steps outlined in this guide, you can build a functional and efficient electric brew kettle. Remember to prioritize safety and proper maintenance for the best results. Experimenting with different recipes will enhance your brewing skills. Enjoy the process of brewing and have fun creating your own unique flavors.


